Nathan Handler's Blog

FOSSCON
6th October 2016

This post is long past due, but I figured it is better late than never. At the start of the year, I set a goal to get more involved with attending and speaking at conferences. Through work, I was able to attend the Southern California Linux Expo (SCALE) in Pasadena, CA in January. I also got to give a talk at O'Relly's Open Source Convention (OSCON) in Austin, TX in May. However, I really wanted to give a talk about my experience contributing in the Ubuntu community.

José Antonio Rey encouraged me to submit the talk to FOSSCON. While I've been aware of FOSSCON for years thanks to my involvement with the freenode IRC network (which has had a reference to FOSSCON in the /motd for years), I had never actually attended it before. I also wasn't quite sure how I would handle traveling from San Francisco, CA to Philadelphia, PA. Regardless, I decided to go ahead and apply.

Fast forward a few weeks, and imagine my surprise when I woke up to an email saying that my talk proposal was accepted. People were actually interested in me and what I had to say. I immediately began researching flights. While they weren't crazy expensive, they were still more money than I was comfortable spending. Luckily, José had a solution to this problem as well; he suggested applying for funding through the Ubuntu Community Donations fund. While I've been an Ubuntu Member for over 8 years, I've never used this resource before. However, I was happy when I received a very quick approval.

The conference itself was smaller than I was expecting. However, it was packed with lots of friendly and familiar faces of people I've interacted with online and in person over the years at various Open Source events.

I started off the day by learning from José how to use Juju to quickly setup applications in the cloud. While Juju has definitely come a long way over the last couple of years, and it appears t be quite easy to learn and use, it still appears to be lacking some of the features needed to take full control over how the underlying applications interact with each other. However, I look forward to continuing to watch it grow and mature.

Net up, we had a lunch break. There was no catered lunch at this conference, so we decided to get some cheesesteak at Abner's (is any trip to Philadelphia complete without cheesesteak?).

Following lunch, I took some time to make a few last minute changes to my presentation and rehearse a bit. Finally, it was time. I got up in front of the audience and gave my presentation. Overall, I was quite pleased. It was not perfect, but for the first time giving the talk, I thought it went pretty well. I will work hard to make it even better for next tme.

Following my talk was a series of brief lightning talks prior to the closing keynote. Another long time friend of mine, Elizabeth Krumbach Joseph, was giving the keynote about listening to the needs of your global open source community. While I have seen her speak on several other occassions, I really enjoyed this particular talk. It was full of great examples and anecdotes that were easy for the audience to relate to and start applying to their own communities.

After the conference, a few of us went off and played tourist, paying the Liberty Bell a visit before concluding our trip in Philadelpha.

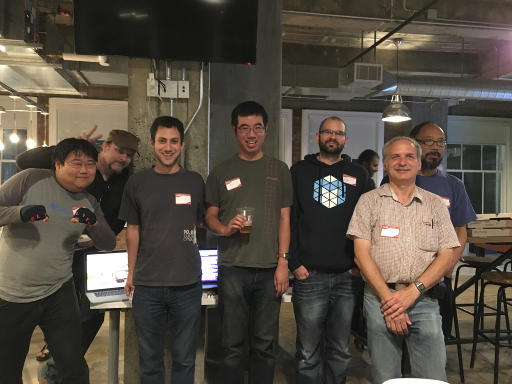
Overall, I had a great time as FOSSCON. It was great being re-united with so many friends. A big thank you to José for his constant support and encouragement and to Canonical and the Ubuntu Community for helping to make it possible for me to attend this conference. Finally, thanks to the terrific FOSSCON staff for volunteering so much time to put on this great event.
Tags: conferences, planet-debian, planet-ubuntu.
Ubuntu California 15.10 Release Party
3rd November 2015

Ubuntu California 15.10 Release Party

On Thursday, October 22, 2015, Ubuntu 15.10 (Wily Werewolf) was released. To celebrate, some San Francisco members of the Ubuntu California LoCo Team held a small release party. Yelp was gracious enough to host the event and provide us with food and drinks. Canonical also sent us a box of swag for the event. Unfortunately, it did not arrive in time. Luckily, James Ouyang had some extra goodies from a previous event for us to hand out. Despite having a rather small turnout for the event, it was still a fun night. Several people borrowed the USB flash drives I had setup with Ubuntu, Kubuntu, and Xubuntu 15.10 in order to install Ubuntu on their machines. Other people were happy to play around with the new release in a virtual machine on my computer. Overall, it was a good night. Hopefully, we can put together an even better and larger release party for Ubuntu 16.04 LTS.

Tags: loco, planet-debian, planet-ubuntu.
Introducing nmbot
11th November 2012

While going through the NM Process, I spent a lot of time on https://nm.debian.org. At the bottom of the page, there is a TODO list of some new features they would like to implement. One item on the list jumped out at me as something I was capable of completing: IRC bot to update stats in the #debian-newmaint channel topic. I immediately reached out to Enrico Zini who was very supportive of the idea. He also explained how he wanted to expand on that idea and have the bot send updates to the channel whenever the progress of an applicant changes. Thanks to Paul Tagliamonte, I was able to get my hands on a copy of the nm.debian.org database (with private information replaced with dummy data). This allowed me to create some code to parse the database and create counts for the number of people waiting in the various queues. I also created a list of events that occurred in the last n days. Enrico then took this code and modified it to integrate it into the website. You can specify the number of days to show events for, and even have the information produced in JSON format. This information is generated upon requesting the page, so it is always up-to-date. It took a couple of rounds of revisions to ensure that the website was exposing all of the necessary information in the JSON export. At this stage, I converted the code to be an IRC bot. Based on prior experience, I decided to implement this as an irssi5 script. The bot is currently running as nmbot in #debian-newmaint on OFTC. Every minute, it fetches the JSON statistics to see if any new events have occurred. If they have, it updates the topic and sends announcements as necessary.

While the bot is running, there are still a few more things on its TODO list. First, we need to move it to a stable and permanent home. Running it off of my personal laptop is fine for testing, but it is not a long term solution. Luckily, Joerg Jaspert (Ganneff) has graciously offerred to host the bot. He also made the suggestion of converting the bot to a Supybot plugin so that it could be integrated into the existing ftpmaster bot (dak). The bot's code is currently pretty simple, so I do not expect too much difficulty in converting it to Python/supybot. One last item on the list is something that Enrico is working on implementing. He is going to have the website generate static versions of the JSON output whenever an applicant's progress changes. The bot could then fetch this file, which would reduce the number of times the site needs to generate the JSON. The code for the bot is available in a public git repository, and feedback/suggestions are always appreciated.

Tags: nmbot, planet-debian, planet-ubuntu.
Debian Developer
11th November 2012

Today, I officially got approved by the Debian Account Managers as a Debian Developer (still waiting on keyring-maint and DSA). Over the years, I have seen many people complain about the New Member Process. The most common complaint was with regards to the (usually) long amount of time the process can take to complete. I am writing this blog post to provide one more perspective on this process. Hopefully, it will prove useful to people considering starting the New Member Process.

The most difficult part about the New Member Process for me had to do with getting my GPG key signed by Debian Developers. I have not been able to attend any large conferences, which are great places to get your key signed. I also have not been able to meet up with the few Debian Developers living in/around Chicago. As a result, I was forced to patiently wait to start the NM process. This waiting period lasted a couple of years. It wasn't until this October, at the [Association for Computing Machinery at Urbana-Champaign's Reflections | Projections Conference], that this changed. Stefano Zacchiroli was present to give a talk about Debian. Asheesh Laroia was also present to lead an OpenHatch Workshop about contributing to open source projects. Both of these Developers were more than willing to sign my key when I asked. If you look at my key, you will see that these signatures were made on October 7 and October 9, 2012.

With the signatures out of the way, the next step in the process was to actually apply. Since I did not already have an account in the system, I had to send an email to the Front Desk and have them enter my information into the system. Details on this step, along with a sample email are available here.

Once I was in the system, the next step was to get some Debian Developers to serve as my advocates. Advocates should be Debian Developers you have worked closely with, and usually include your sponsor(s). If these people believe you are ready to become a Debian Developer, they write a message describing the work you have been doing with them and why they feel you are ready. Paul Tagliamonte had helped review and sponsor a number of my uploads. I had been working with him for a number of years, and he really helped encourage and help me to reach this milestone. He served as my first advocate. Gregor Herrmann is responsible for getting me started in contributing to Debian. When I first tried to get involved, I had a hard time finding sponsors for my uploads and bugs to work on. Eventually, I discovered the Debian Perl Group. This team collectively maintains most of the Perl modules that are included in the Debian repositories. Gregor and the other Debian Developers on the team were really good about reviewing and sponsoring uploads in a very timely manner. This allowed me to learn quickly and make a number of contributions to Debian. He served as my second advocate.

With my advocations taken care of, the next step in the process was for the Front Desk to assign me an Application Manager and for the Application Manager to accept the appointment. Thijs Kinkhorst was appointed as my Application Manager. He also agreed to take on this task. For those of you who might not know, the Application Manager is in charge of asking the applicant questions, collecting information, and ultimately making a recommendation to the Debian Account Managers about whether or not they should accept the applicant as a Developer. They can go about this in a variety of ways, but most choose to utilize a set of template questions that are adjusted slightly on a per-applicant basis.

Remember that period of waiting to get my GPG key signed? I had used that time to go through and prepare answers to most of the template questions. This served two purposes. First, it allowed me to prove to myself that I had the knowledge to become a Debian Developer. Second, it helped to greatly speed up the New Member process once I actually applied. There were some questions that were added/removed/modified, but by answering the template questions befrehoand, I had become quite familiar with documents such as the Debian Policy and the Debian Developer's Rerference. These documents are the basis for almost all questions that are asked. After several rounds of questions, testing my knowledge of Debian's philosophy and procedures as well as my technical knowledge and skills, some of my uploads were reviewed. This is a pretty standard step. Be prepared to explain any changes you made (or chose not to make) in your uploads. If you have any outstanding bugs or issues with your packages, you might also be asked to resolve them. Eventually, once your Application Manager has collected enough information to ensure you are capable of becoming a Debian Developer, they will send their recommendation and a brief biography about you to the debian-newmaint mailing list and forward all information and emails from you to the Debian Account Managers (after the Front Desk checks and confirms that all of the important information is present).

The Debian Account Managers have the actual authority to approve new Debian Developers. They will review all information sent to them and reach their own decision. If they approve your application, they will submit requests for your GPG key to be added to the Debian Keyring and for an account to be created for you in the Debian systems. At this point, the New Member process is complete. For me, it took exactly 1 month from the time I officially applied to become a Debian Developer until the time of my application being approved by the Debian Account Managers. Hopefully, it will not be long until my GPG key is added to the keyring and my account is created. I feel the entire process went by very quickly and was pain-free. Hopefully, this blog post will help to encourage more people to apply to become Debian Developers.

Tags: debiandeveloper, planet-debian, planet-ubuntu.
Debian Screencast Challenge
30th October 2012

Today in #debian-mentors, a brief discussion about screencasts came up. Some people felt that a series of short screencasts might be a nice addition to the existing Debian Developer documentation. After seeing the popularity of of Ubuntu's various video series over the years, I tend to agree that video documentation can be a nice way to supplement traditional text-based documentation. No, this is not designed to replace the existing documentation; it is merely designed to provide an alternative method for people to learn the material.

From past experience, I know that if I were to start making screencasts by myself, I would end up making one or two before getting bored and moving on to a new project. That is why I am posing a challenge to the Debian community: I will make one screencast for every screencast made by someone in the Debian community. These screencasts can and should be short (only a couple of minutes in length) and focus on accomplishing one small task or explaining a single concept related to Debian Development. I discovered a Debian Screencasts page on the Debian wiki that links to Ubuntu's guide to creating screencasts. While I have done some traditional documentation work in the past, I have never really tried doing screencasts. As a result, this will be a bit of a learning experience for me at first.

If you are interested in taking me up on this challenge, simply send me an email (nhandler [at] ubuntu [dot] com) or poke me on IRC (nhandler@{freenode,oftc}). This will allow us to coordinate and plan the screencasts. As I mentioned earlier, I have no experience creating screencasts, so if you are familar with the Debian Development processes and think this challenge sounds interesting, feel free to contact me.

Tags: planet-debian, planet-ubuntu, screencast.
Hello Chronicle!
29th October 2012

Over the years, I have had many different blogs. I mainly use them to post updates regarding my work in the FOSS community, with most of these relating to Ubuntu/Debian. My most recent blog was a Wordpress instance I ran on a VPS provided by a friend. This worked pretty well, but for various reasons, I no longer have access to that box.

Earlier today, I started thinking about launching a new blog. The first problem I had to overcome was deciding where to host it. Many of the groups I am involved with provide members with a ~/public_html directory that can be used to host simple HTML+Javascript+CSS websites. However, most of these sites do not have the ability to use PHP, CGI, or access databases. I realized rather quickly that if I were to find a blogging platform that I could run from a ~/public_html directory on one of those machines, I would never have the problem of not having a host for my blog ever again. There is a near infinite number of free web hosts that can handle simple HTML sites.

One key feature of any blog is the ability for readers to subscribe to it. Usually, the blogging platform handles automatically updating the feed when a new post is published. However, my simple HTML blog would not be able to do that. Since I knew I did not want to manually update the feeds, I started looking for a way to generate the feed locally on my personal machine and then push it to the remote site that is hosting my blog.

About this time, I started compiling a list of features I would need to make this blogging platform usable. In no particular order, they included:

After some searching, I found an application developed by Steve Kemp called Chronicle. Chronicle supports all of the features I described plus many more. It is also very quick and easy to setup. If you are running Debian, Chronicle is available from the repositories.

Start by installing Chronicle. Note that these steps should all be done on your personal machine, not the machine that is going to host your blog.

sudo apt-get install chronicle

There are a few other packages that you can install to extend the functionality of Chronicle

sudo apt-get install memcached libcache-memcached-perl libhtml-calendarmonthsimple-perl libtext-vimcolor-perl libtext-markdown-perl

Next, create a few folders to hold our blog. We will store our raw blog posts in ~/blog/input and have the generated HTML versions go in ~/blog/output.

mkdir -p ~/blog/{input,output}

Now, we need to configure some preferences. We will base our preferences on the global configuration file shipped with the package.

cp /etc/chroniclerc ~/.chroniclerc

Open up the new ~/.chroniclerc file in your favorite editor. It is pretty well commented, but I will still explain the changes I made.

input is the path to where your blog posts can be found. These are the raw blog posts, not the generated HTML versions of the posts. In our example, this should be set to ~/blog/input.

pattern tells Chronicle which files in the input directory are blog posts. We will use a .txt extension to denote these files. Therefore, set pattern to *.txt.

output is the directory where Chronicle should store the generated HTML versions of the blog posts. This should be ~/blog/output

theme-dir is the directory that holds all of the themes. Chronicle ships with a couple of sample themes that you can use. Set this to /usr/share/chronicle/themes

theme is the name of the theme you want to use. We will just use the default them, so set this to default

entry-count specifies how many blog posts should be displayed on the HTML index page for the blog. I like to keep this fairly small, so I set mine to 10.

rss-count is similar to entry-count, but it specifies the number of blog posts to include in the RSS feed. I also set this to 10

format specifies the format used in the raw blog posts. I write mine in markdown, but multimarkdown, textile, and html are also supported.

Since most ~/public_html directories do not support CGI. We will disable comments by setting no-comments to 1

suffix gets appended to the filenames of all of the generated blog posts. Set this to .html

url_prefix is the first part of the URL for the blog. If the index.html file for the blog is going to be available at http://example.com/blog/ , set this to *http://example.com/~user/blog/

blog_title is whatever you want your blog to be called. The title is displayed at the top of the site. Set it to something like Your Name's Blog

post-build is a very useful setting. It allows us to have Chronicle perform some action after it finishes running. We will use this to copy our blog to the remote host's public_html directory. Set this field to something like scp -r output/* user@example.com:~/public_html/blog. You will probably want to setup SSH so that you do not need to enter a password each time.

Finally, date-archive-path will allow you to get the nice year/month directories to sort your posts. Set this to 1.

Your final ~/.chroniclerc should look something like this:

input = ~/blog
pattern = *.txt
output = ~/blog/output
theme-dir = /usr/share/chronicle/themes
theme = default
entry-count = 10
rss-count = 10
format = markdown
no-comments = 1
suffix = .html
url_prefix = http://example.com/~user/blog/
blog_title    = Your Name's Blog
post-build = scp -r output/* user2@example.com:~/public_html/blog
date-archive-path = 1

You are now ready to start writing your first blog post. Open up ~/blog/MyFirstBlogPost.txt in your favorite text editor. Modify it to look like this:

Title: My First Blog Post
Tags: MyTag
Date: October 29, 2012

This is my **first** blog post.

Notice the metadata stored at the top? This is required for every post. Chronicle uses it to figure out the post title, tags, and date. It has some logic to try and guess this information if missing, but it is probably safest if you specify it. The empty line between the metadata and the post content is also required.

Remember, we configured Chronicle to treat these as Markdown files, so feel free to utilize any Markdown formatting you wish. Finally, run chronicle from a terminal. If all goes well, it should generate your blog and copy the files to the remote host. You can now go to http://example.com/~user/blog to view it.

One final suggestion would be to store the entire blog in a git repository. This will allow you to utilize all of the features of a VCS, such as reverting any accidental changes or allowing multiple people to collaborate on a blog post at the same time.

Tags: chronicle, planet-debian, planet-ubuntu.

RSS feed

Created by Chronicle v4.6